Imagine this scenario. You’re a contact center agent on a call with a customer who wants to know why the balance transfer request that was approved hasn’t yet been actioned. You’re able to verify the customer’s details using the 360 degree view of the customer that’s visible in the Microsoft Dynamics Contact Center Agent Workspace. However, you now need to log into another system in order to search for the customer and then search for the balance transfer request to begin your investigation. You have perfected the art of small talk for these occasions and as you wait for the screens to load, you explain patiently what’s happening. Luckily, this time your customer is patient with the wait.
Agents typically interact with 8 to 10 systems depending on the complexity of the conversation. Every second counts and the ease to find information is important in order to ensure the customer’s query can be responded to quickly and accurately.
Microsoft’s Copilot in Service is known to allow agents to access information hosted in knowledge and other sources e.g. Sharepoint and Onedrive. However, a feature less known and used is the ability to for agents to access information from third party systems. This feature will have a direct positive impact on Agent KPIs. Namely:
- Average Handling Time
- First Time Resolution
- Training Time per Agent
- Customer Satisfaction Rate
The video below demonstrates an agent requesting information from Salesforce via Copilot in Service.
This blog will detail a step by step walkthrough of how to build a copilot plugin to access information from a third party solution. I will be using Salesforce as an example.
Pre Requisites:
- a Salesforce developer account
- a working custom connector with output variables
There will be three sections to configure the plugin
- Getting Salesforce ready to work with the custom connector by creating an External Connector App and updating the Referral URL.
- Creating the plugin in Microsoft Copilot Studio
- Enabling the plugin in Dynamics Customer Service Admin Center
If you are using another application, i.e. Not Salesforce, feel free to jump ahead to the applicable sections.
Configure Salesforce to Allow Access to the Custom Connector
- In Power Automate, open your Custom Connector
2. Copy the Referral URL from the Security Tab

3. Log into the Salesforce developer account
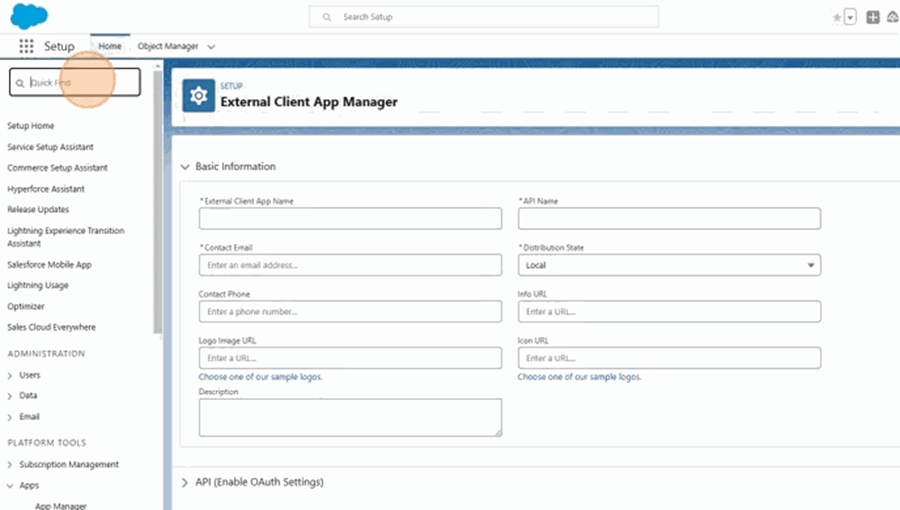
4. Go to “Quick Find”
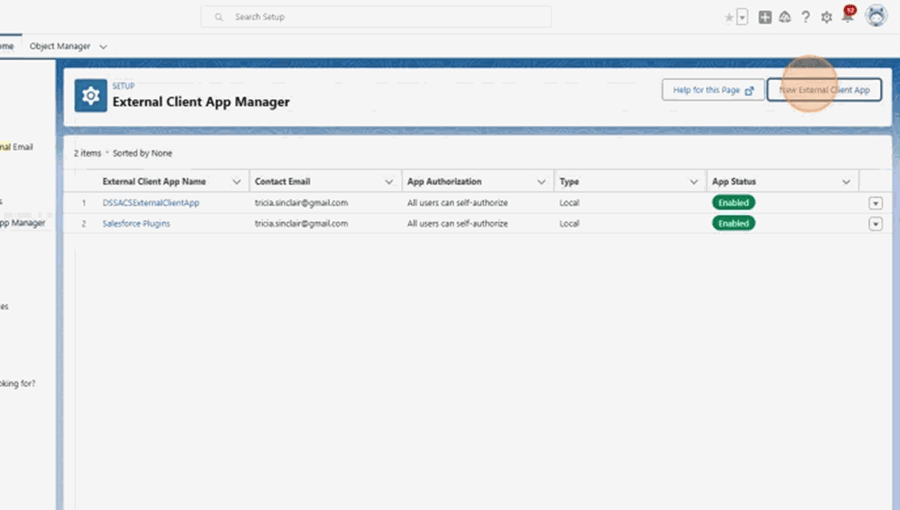
5. Search for and Open the “External Client App Manager”
6. Click “New External Client App”
7. Populate the “*External Client App Name” field.
8. Populate the “*Contact Email” field.
9. Click the “API (Enable OAuth Settings)” to view the additional settings
10. Click to Enable OAuth

11. Paste the redirect url copied from Power Automate to the “*Callback URL” field.
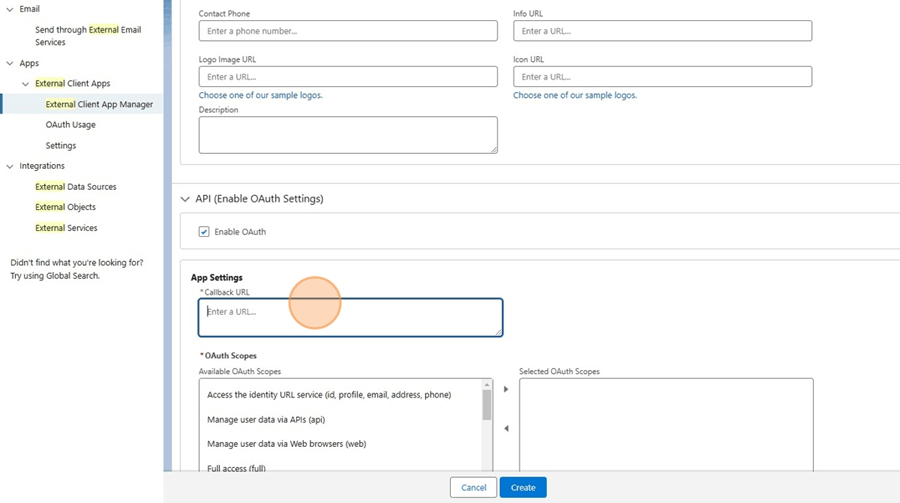
12. Update the OAuth Scope by moving the below scopes to the Selected OAuth Scopes:
13. “Access the identity URL service (id, profile, email, address, phone)”
14. “Manage user data (api)”
15. “Access unique user identifiers (openid)”
16. “Perform requests at any time (refresh_token, offline_access)”

17. In Flow Enablement, click to enable Client Credentials Flow and click OK on the popup that appears next.
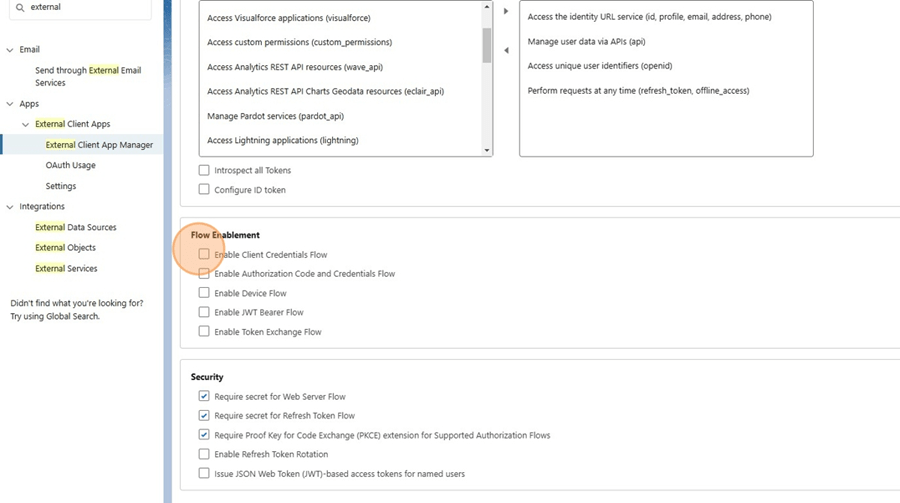
18. Click to Enable Authorisation Code and Credentials Flow
19. Click “Create”

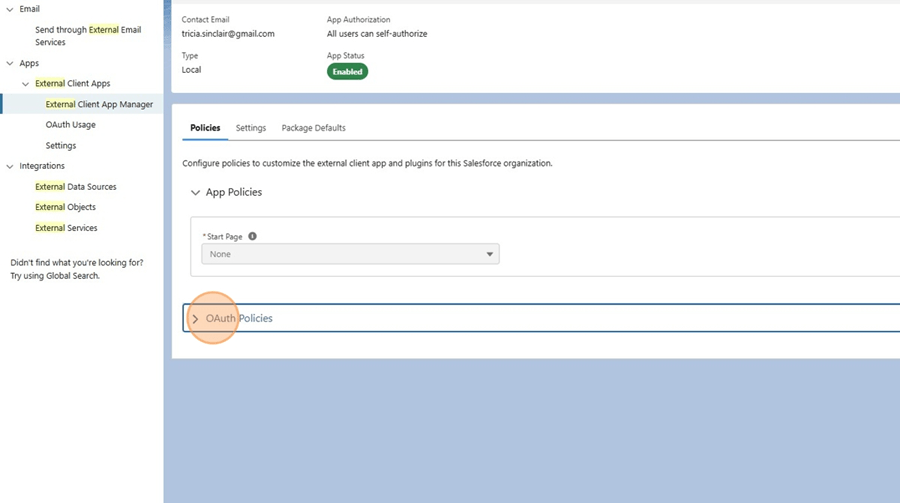
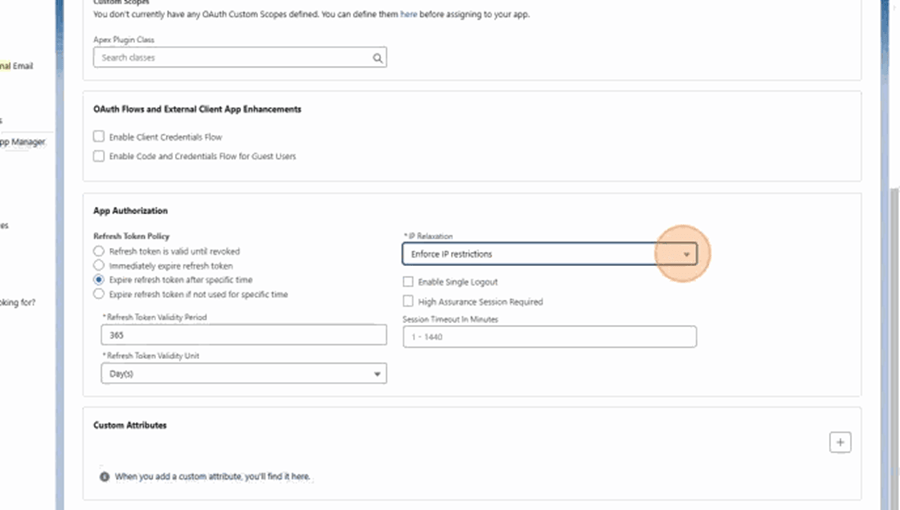
20. Click Settings -> “OAuth Settings” and Click “Policies”

21. Click “OAuth Policies”
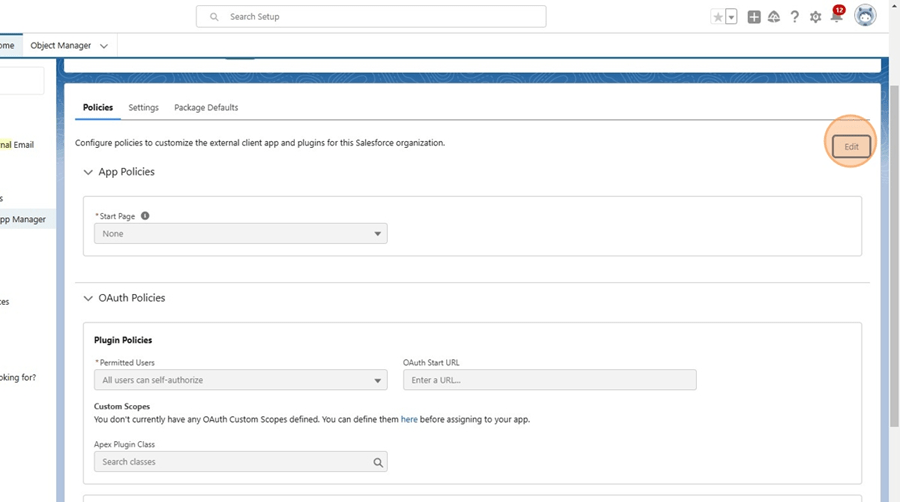
22. Click “Edit”
23. Update the IP Restrictions field to choose “Relax IP restrictions”
24. Click “Enable Client Credentials Flow”
25. Click the “*Run As (Username)” field and populate the appropriate Salesforce user with the privileges to authenticate and make the necessary query
26. Click “Save”
Create Plugin in Microsoft Copilot Studio
Open Microsoft Copilot Studio and select the correct Environment
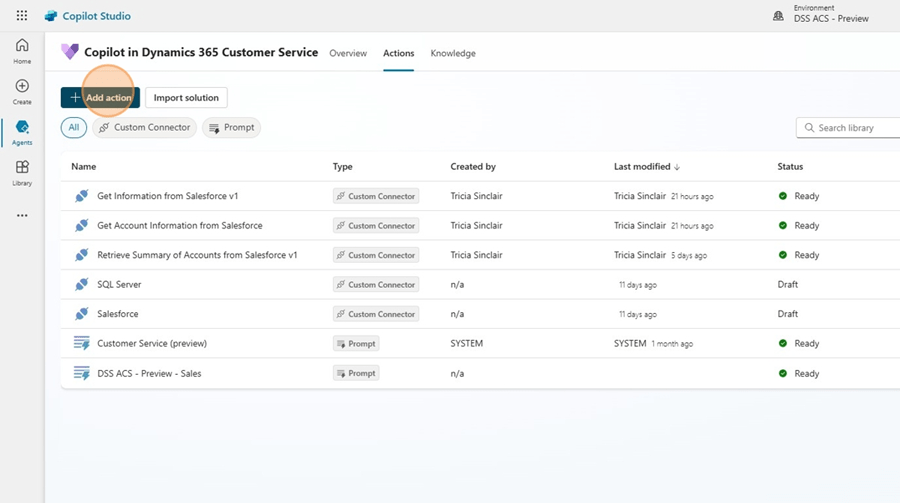
Click “Agents” in the Navigation pane
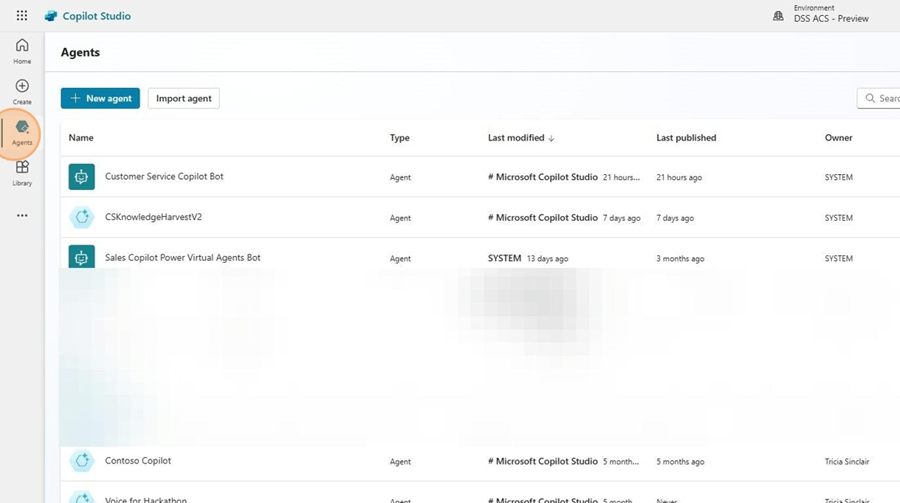
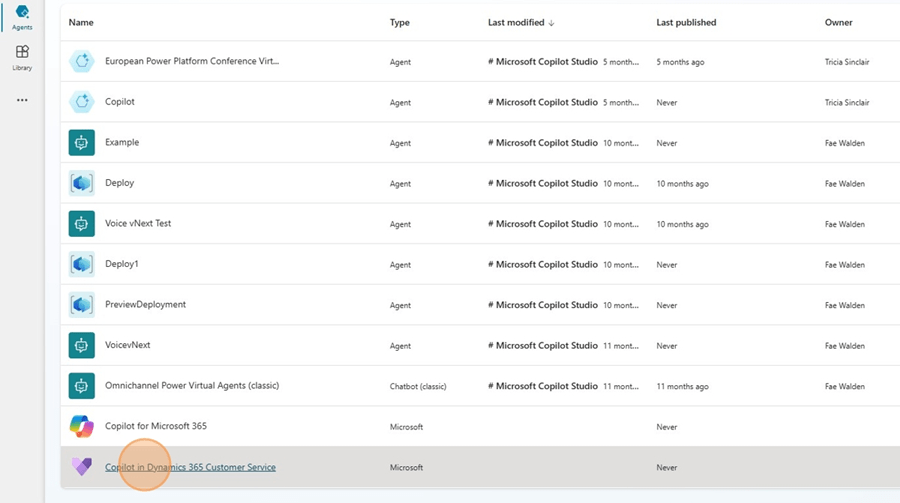
Select “Copilot in Dynamics 365 Customer Service”
Click “Actions”
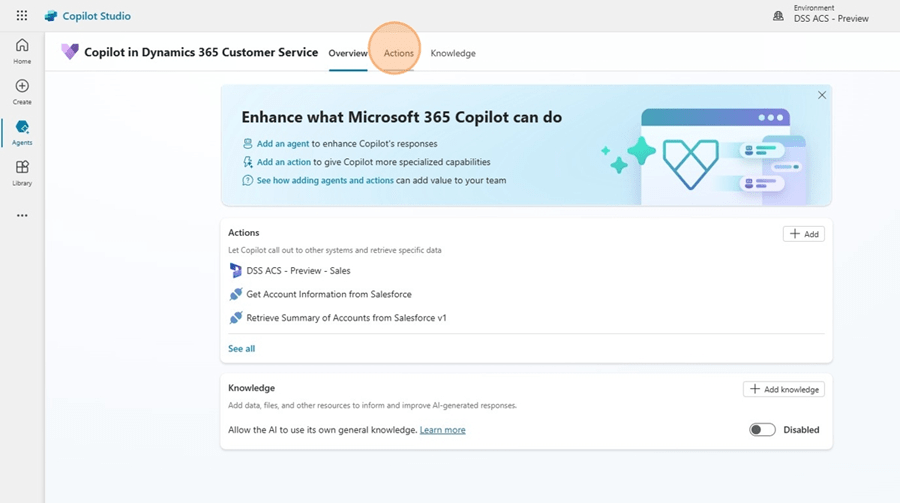
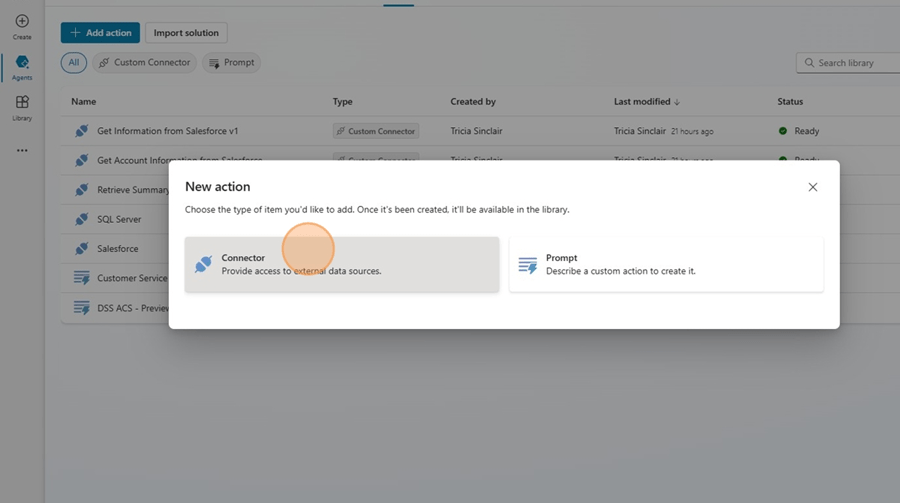
Click “Add action”
Select “Connector”
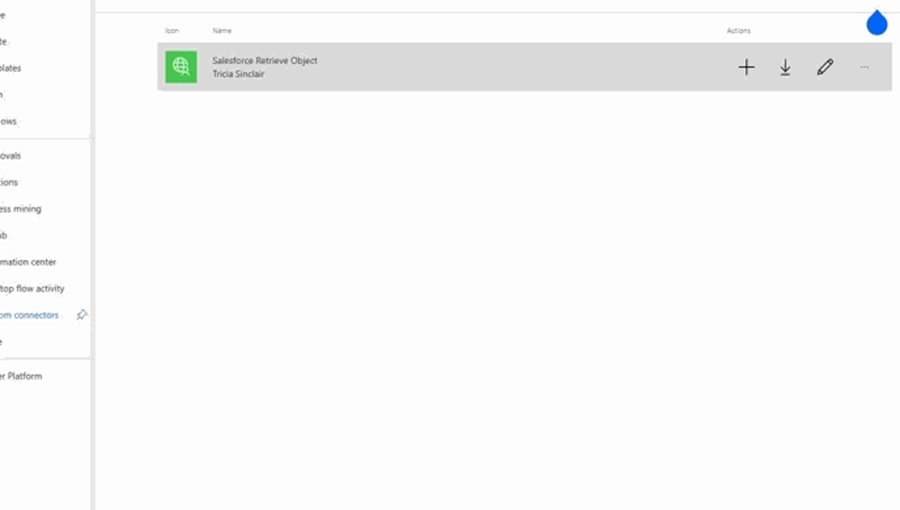
Search for and select the Connector created earlier
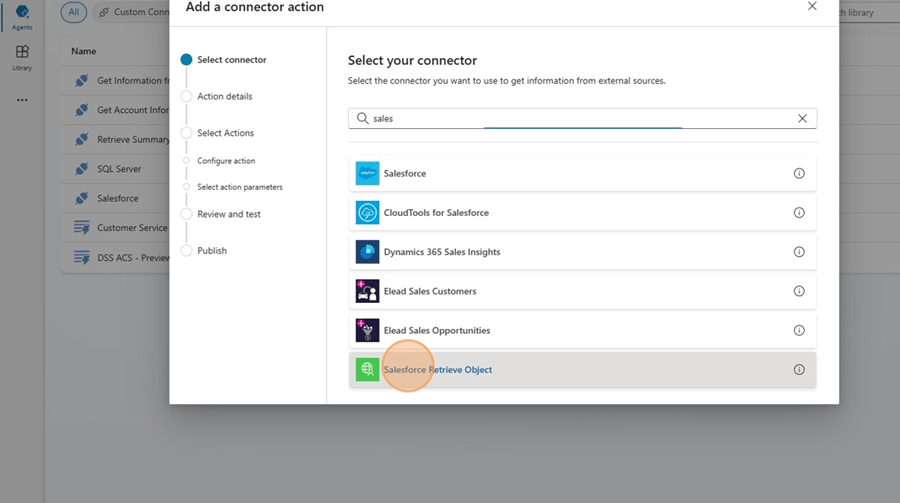
Click “Next”
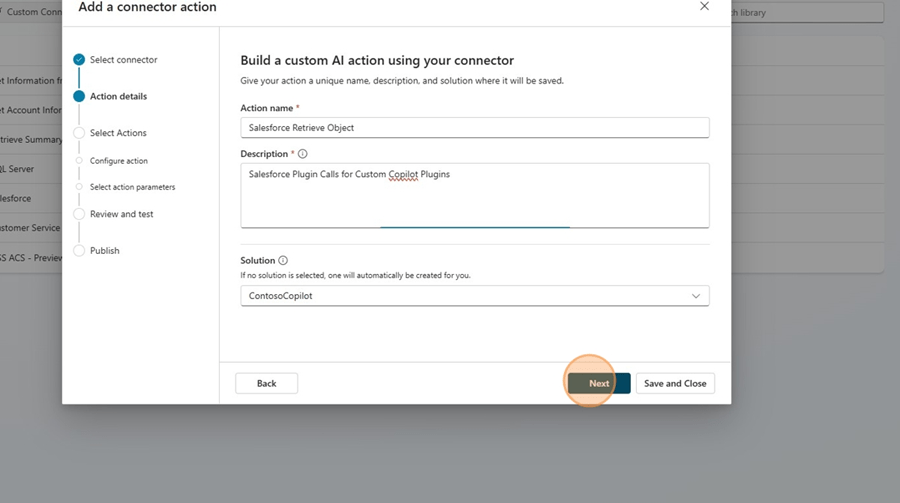
Select the method to be associated to the plugin

Populate the “Action name*” field and the “Action description*” field.

Click “Next”
Populate the descriptions of the Input and Output fields.
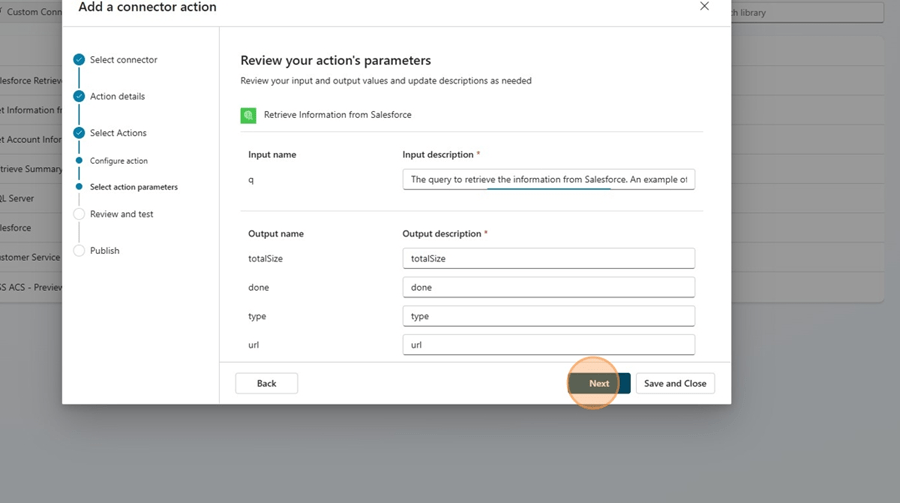
Click “Next” and save the plugin
Enable the Plugin in Dynamics 365 Customer Service Admin Center
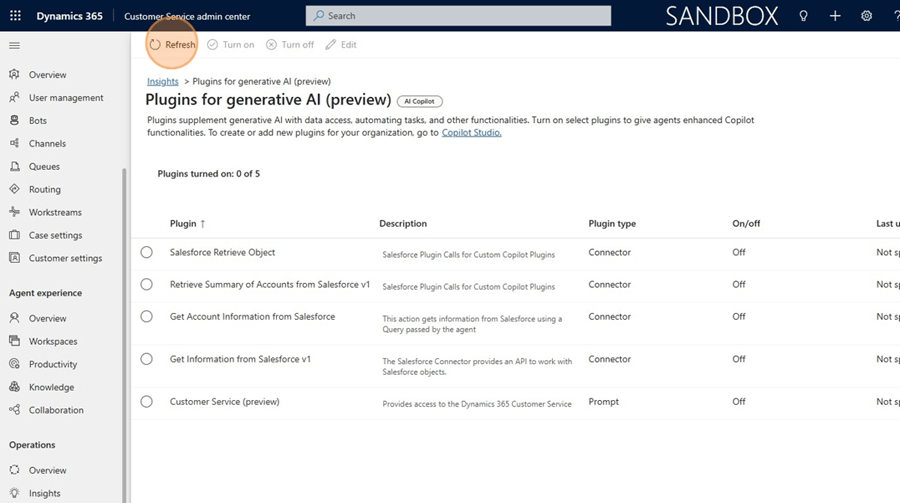
Browse to Customer Service Admin Center and Click “Insights”
Click “Manage”
Click “Refresh” to ensure the list of plugins are up to date
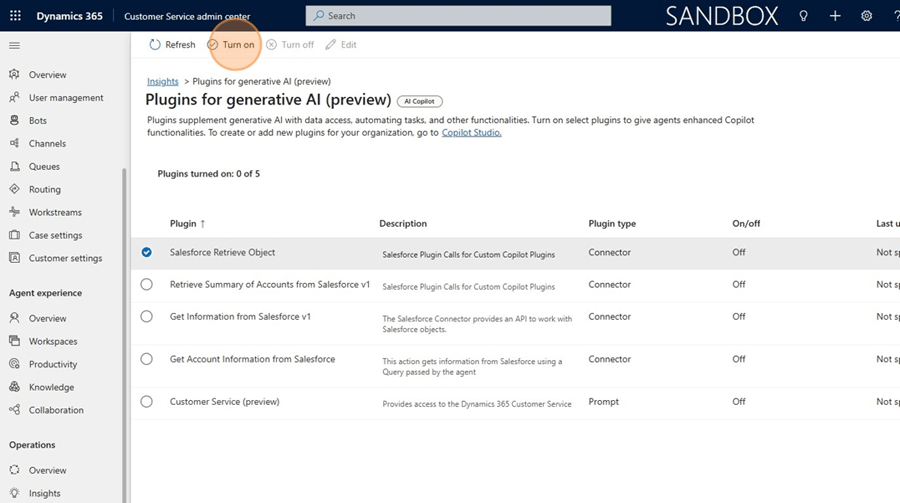
Select the plugin and Click “Turn on”
Ensure the connector being used has the right connection reference
Select Admin as the User Authentication
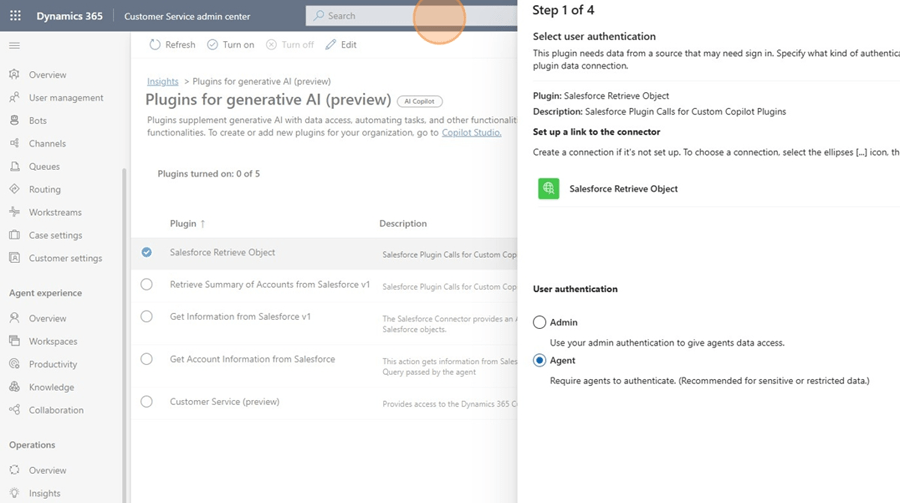
Click “Next”
Select the plugin Name as we will not map fields to a record in this instance.

Click “Next”
Click “Turn on plugin” and Click “Publish changes”

Update the plugin in Microsoft Copilot Studio
In Microsoft Copilot Studio, Browse to Actions and Select Customer Service Copilot Bot. The plugins which are turned on will appear in this Bot.
Select the Actions Tab
Select the Outputs option and ensure the below options are available:
- Total Size
- Display name: totalSize
- Description: totalSize
- Done
- Display name: done
- Description: done
- Records
- Display name: records
- Description: type
Press Save
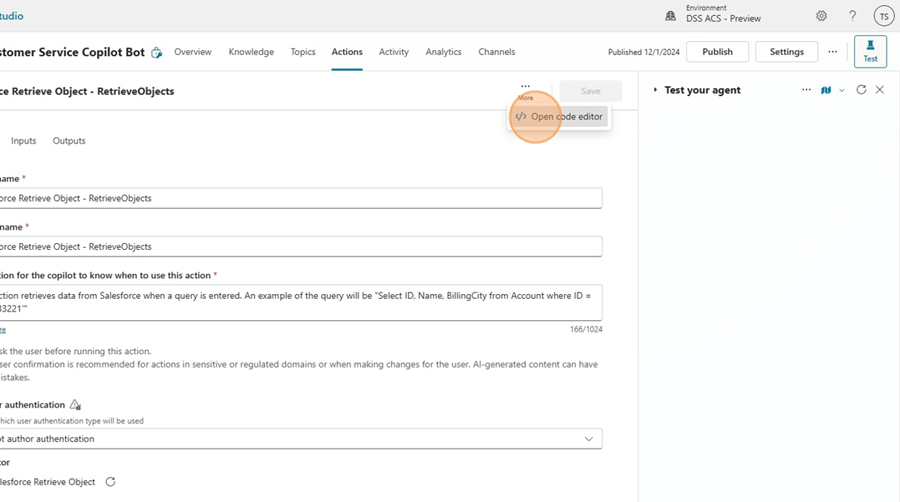
Click “More” and Click “Open code editor”
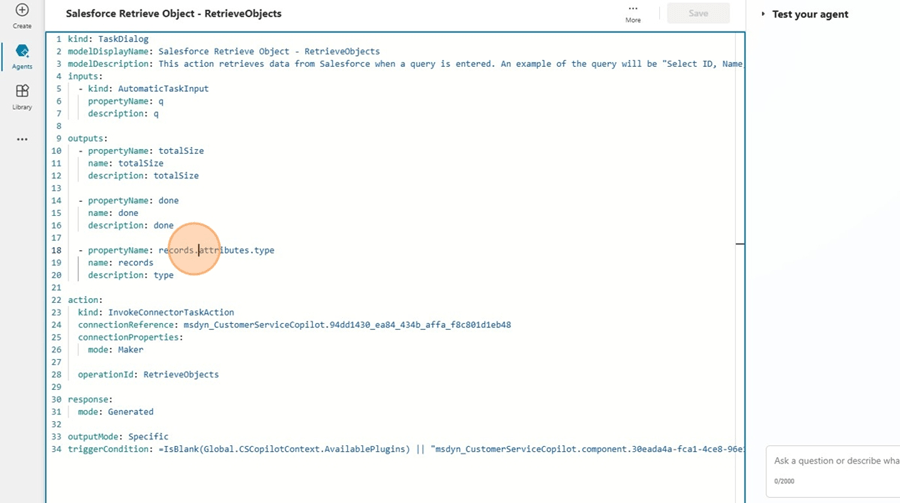
Update the records attribute to flatten the output.
Click “Save” and Publish
Lets Get Testing!
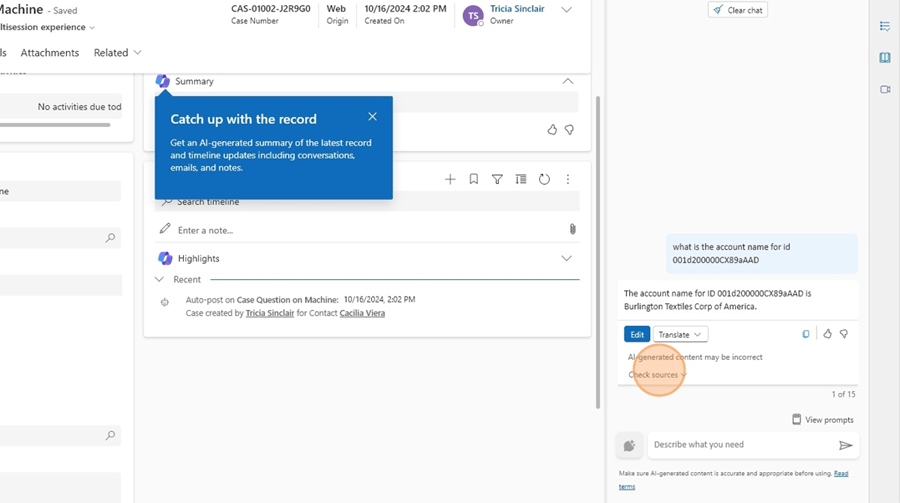
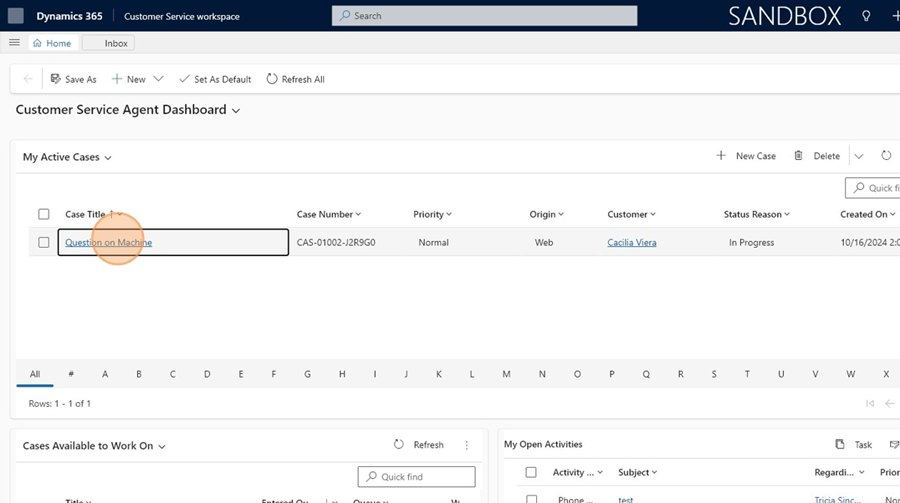
In the Agent Workspace, Test the plugin by opening a record
Make a query using natural language that includes the necessary information for the plugin.
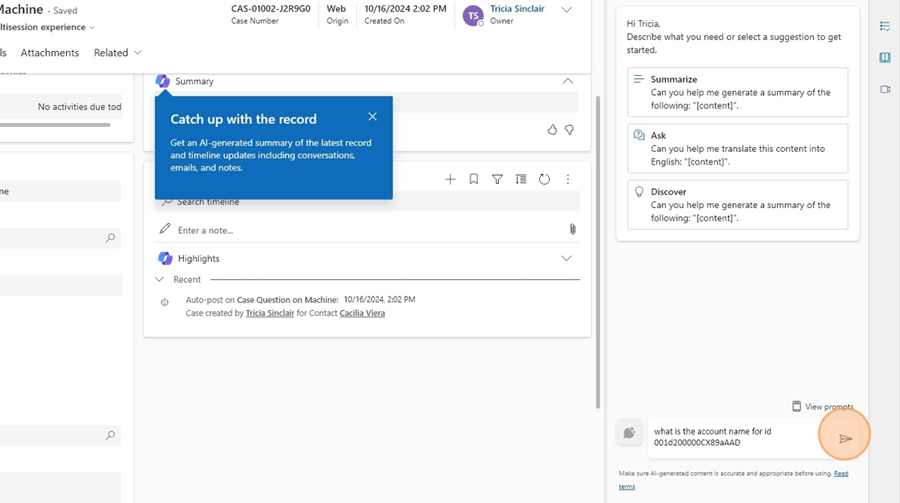
Click “Check sources” to ensure that the correct plugin is being called.