One of the features currently in preview for the Omni Channel Engagement Hub is Co-Browse. The co-browse feature is provided by ScreenMeet, a Microsoft ISV with an existing co-browse and remote assist solution that integrates with Dynamics 365. The solution offered for co-browse has now been extended to the Omni Channel Engagement Hub.
The video below shows co-browse in action and what to expect once you’ve managed to set it up.
To Set up Co-Browse (in preview) –
- Download the Screenmeet co-browse trial from AppSource.
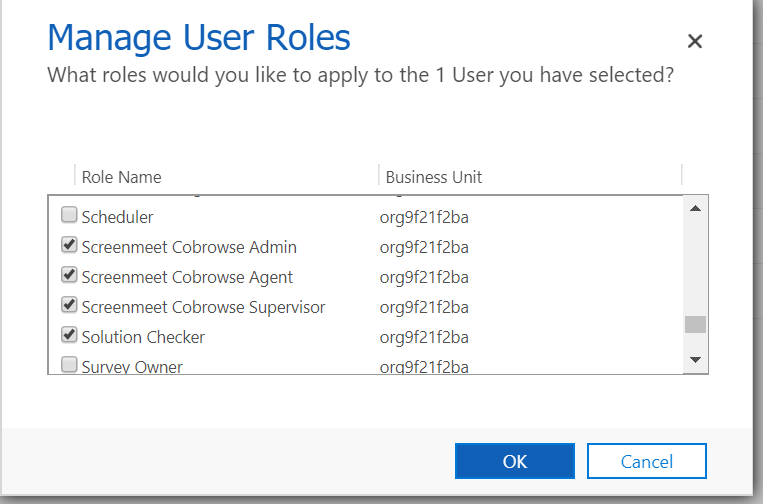
- Ensure the user setting up co-browse has been assigned the user roles:
- Common Data Service User
- Customer Service Representative
- Screenmeet Cobrowse Admin
- OmniChannel Administrator
- Enable co-browsing in the Omni Channel Engagement Hub Admin app by browsing to the Chat option in the Channels section and selecting the chat widget that co-browsing will be enabled on.
- Select the conversation options tab and choose the enabled option before selecting the co-browse provider as ScreenMeet.
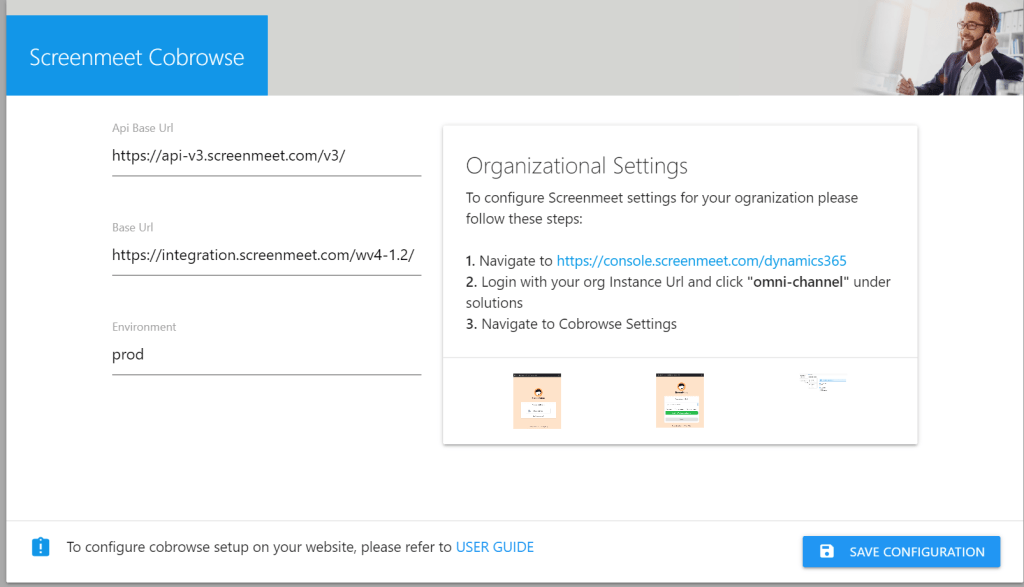
- In the OmniChannel Engagement Hub Admin App, select the configuration option in the Screenmeet Cobrowse section
- Click on the url provided and when prompted select the omni channel option to configure access to your dynamics instance. If an error is generated here, attempt this step in a private session.
- Browse to the Application Tab Templates and open the template available for screenmeet_cobrowse. (There may be duplicate parameters available. If this is the case, recreate the application tab template with the populated parameters and delete the original application template created.)

- In order to create a session, you will need to contact ScreenMeet support for them to enable the preview.
Configuring Co-Browse in the Power App Portal
The option for the customer to enter the pin number must also be added to the portal. To do this add the below script to the chat widget content snippet in the D365 Portals app.
<link href="https://cobrowse.screenmeet.com/CobrowseCore.js" rel="preload" as="script">
<script type="text/javascript" async="true" src="https://cobrowse.screenmeet.com/CobrowseBootstrap.js"></script>
<script type="text/javascript" >
window.Cobrowse = window.Cobrowse || {};
window.Cobrowse.modal = window.Cobrowse.modal || {
  commandQueue:[],
  useHotkeys: true
};
</script>
You should now have Co-Browse up and running!

One thought on “Omni Channel Engagement Hub – Setting up Co-Browse”